How to center a candle wick (and keep it straight)
Updated October 14, 2026
From our shop
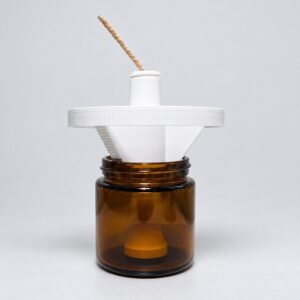
The short answer
- 2 points keep a wick straight: the tab stuck at the center of the jar bottom, and the top held centered while the wax sets.
- Stick the tab with a wick sticker or a dab of hot glue before you pour.
- Right after pouring, hold the top with a centering tool. Leave it on until the wax is solid all the way through.
- Cool the candle slowly and keep it still. Fans, aircon drafts and moving the jar pull the wick off center.
Why a centered wick matters
A flame melts wax outward in a circle. If the wick sits off center, the melt pool reaches one side first. Wax on the far side stays hard and the candle tunnels, while the glass nearest the flame runs hotter.
A wick that leans has the same effect. Fixing both ends of the wick while the wax sets prevents both.
What you need
- Pre-tabbed wicks sized for your jar and wax. Start from your wick supplier’s chart, then confirm with a test burn.
- Wick stickers or a hot glue gun
- A straw, wick setter or chopstick to press the tab down
- A centering tool or wick bar to hold the top
- A clean, dry jar at room temperature
Step by step
- Prepare the jar. Wash and dry it fully. Dust or moisture under the tab can make it lift.
- Stick the tab. Put a wick sticker or a dab of hot glue under the metal tab. Thread the wick through a straw or wick setter and press the tab down for a few seconds.
- Check the center. Look straight down from above. The wick should sit in the middle of the opening, not only the middle of the bottom.
- Pour. Pour at the temperature your wax supplier recommends. Pour slowly against the side of the jar, so the stream doesn’t push the wick.
- Hold the top. Pull the wick up through the centering tool and seat the tool on the jar. Keep the wick upright and snug, not stretched.
- Let it set. Leave the candle still until the wax is solid all the way through, often overnight. Keep it away from fans, aircon vents and open windows, which cool one side faster.
- Remove and trim. Lift the tool off and trim the wick to about 6 mm (1/4 inch) before the first burn.
Common problems and fixes
| Problem | Likely cause | Fix |
|---|---|---|
| Wick drifts to one side as it cools | The top wasn’t held, or the jar was moved | Hold the top until the wax has fully set; don’t move the jar |
| Tab lifts off the bottom | Dust or moisture, or a weak sticker | Press the tab firmly on clean, dry glass, or use hot glue |
| Wick leans or curls after setting | The wick was slack, or the tool came off too early | Keep it upright and snug until the center is solid |
| Tunneling | Off-center or undersized wick, or a short first burn | Center the wick, check the wick size, and let the first burn melt to the edge |
| Sinkhole around the wick | Wax shrinks as it cools | Fill it with a small top-up pour once the first pour has set |
On the first burn, let the melt pool reach the edge of the jar before you blow it out. A common rule of thumb is about 1 hour per inch (25 mm) of jar width.
Choosing a centering tool
Clothespins and chopsticks work, but they slip when the jar is bumped. A centering tool sits on the jar itself, so the wick stays in the middle without measuring each one.
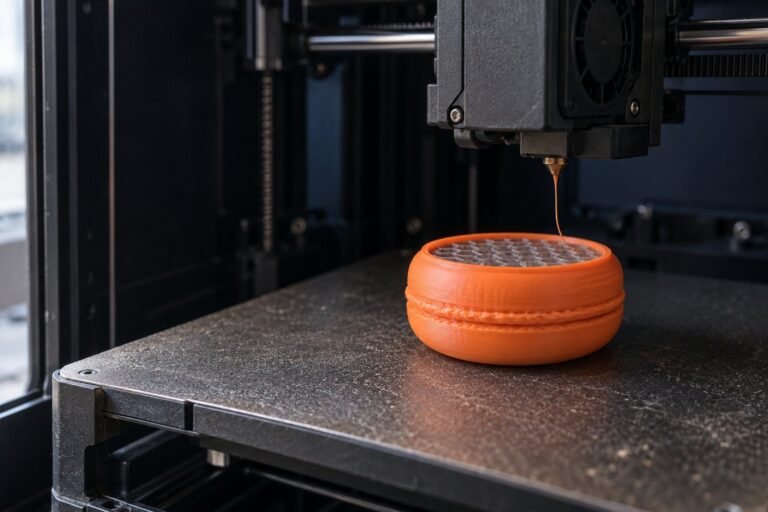
Our wick centering tool is 3D printed in PLA and fits jar openings from 40 to 85 mm. It comes in beige, black or white and ships in 1 to 2 business days.
| Style | Price | Use it for |
|---|---|---|
| 2 mm increments | ₱680 | Openings 40 to 60 mm, and also 61 to 85 mm |
| 1 mm increments | ₱800 | Openings 61 to 85 mm |
| Flat (85 mm OD) | ₱500 | A flat style, 85 mm across |
Measure the inside of the jar opening, not the body: many jars are narrower at the neck. Need another size? Message us.
Candle wick FAQ
How do you keep a candle wick centered?
Fix both ends. Stick the tab to the center of the jar bottom, then hold the top of the wick with a centering tool until the wax has fully set. Don’t move the jar while it cools.
When do you put the wick in a candle?
Before you pour. Stick the tab to the bottom of a clean, dry jar first, pour the wax around it, then center the top right after pouring.
Why does my wick move when I pour?
The pour stream pushes it, or the tab wasn’t stuck firmly. Press the tab down on clean glass, pour slowly against the side of the jar, and hold the top of the wick right after.
How long should the wick centering tool stay on?
Until the wax is solid all the way through, often overnight. If you take it off while the center is still soft, the wick can lean.
What happens if a candle wick is off center?
The candle burns unevenly. The melt pool reaches the near side first, the far side tunnels, and the glass nearest the flame runs hotter.
How short should I trim a candle wick?
About 6 mm (1/4 inch) before each burn. A long wick makes a bigger flame and more soot.
What size jars does the Stak Maker wick centering tool fit?
Jar openings from 40 to 85 mm. Choose 2 mm increments for 40 to 60 mm openings, and 1 mm or 2 mm for 61 to 85 mm. The flat style is 85 mm across. Prices start at ₱500.
Making candles to sell?

Need a tool for another jar size? Message us